RV Maintenance & Tutorials
Winterizing 101: How To Not Burst Your Pipes
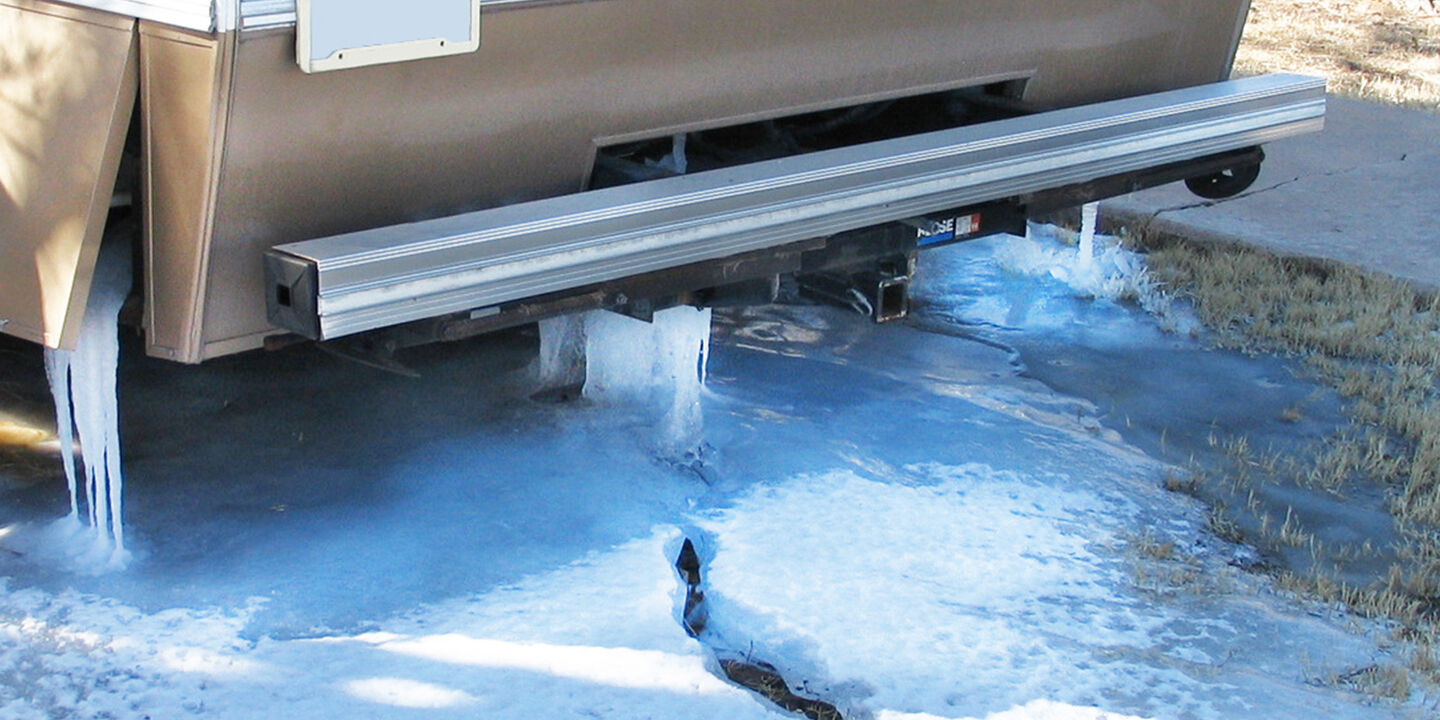
The biggest mistake you can make is either not winterizing your RV or leaving it to the last minute – and by then it’s too late! If you don’t winterize, your RV’s waterlines will freeze when the weather turns cold, after which they will expand and then burst.
Winterizing your RV is cheap; repairing it is not. It’s easier – and cheaper – to winterize your own RV than you might think. Here’s how.
Step 1: Drain the system
Before you start draining, be sure to remove any inline water filters. If you have a filter at the sink faucet, ensure you use a bypass hose once the filter has been removed. Next, drain your black water and then your grey water at a sani-dump station; this order is important because the grey water will wash out the black water. Then, drain your cold and hot water lines; only a little trickle of water will come out. Be sure to put the plugs back on after draining, or your antifreeze will drain out as well.
Next, drain your hot water heater. Open up the hot tap in the kitchen or the relief valve on the water heater itself. This will alleviate pressure. Be careful when draining the hot water heater and make sure you never drain it if it is hot and/or under pressure
The two leading brands of hot water heater are Atwood and Suburban. For an Atwood heater, you’ll need a 7/8” socket with an extension. For a Suburban, you’ll need to remove the anode rod with a 1” 1/16 socket. Let the water drain out.
Step 2: Bypass your hot water heater
There’s no need to add antifreeze to the hot water heater, fresh water tank, or grey and black water holding tanks. They’re already drained, so there’s plenty of room for any remaining liquid that might freeze. In the waterlines themselves, though, there’s no room to expand.
Your heater has a water line in the bottom, which is where the cold water goes in. A hot water line comes out on the top and fills the hot water pipes. A bypass pipe connect those two water lines and prevents antifreeze from entering the water heater.
Most units have this bypass already installed – usually a one-, two- or three-bypass valve system. With a three-valve system, turn the valves on the cold and hot water lines perpendicular to the line itself. Next, turn the valve on the bypass so it’s parallel to the bypass line; water can now bypass the tank and flow freely from the cold line to the hot line.
For a two-valve system, turn both valves to that they’re perpendicular to the cold and hot water lines, and parallel to the bypass line.
With a one-valve system, all you need to do is close the valve so that it appears perpendicular to the cold water line.
If your RV doesn’t have a bypass system built in, you’ll need to buy a temporary bypass kit. Come into your local Fraserway parts department to figure out what you need.
If you have a water filter, you’ll need to bypass that too. Sometimes it’s as simple as removing the filter from its container and re-attaching the container, and sometimes you’ll need to put in a bypass. Again, our parts department can help.
Step 3: Connect antifreeze to the water pump
You’ll need to set up a temporary water pump bypass to get the antifreeze into your plumbing system. Have a few towels handy in case of spillage, and then disconnect the water pump from the fresh water tank on the water pump side. Attach the temporary bypass to the pump side, then place the other end into a jug of RV antifreeze. In total, you’ll probably need two jugs of antifreeze. Make sure it’s non-toxic RV plumbing antifreeze, which is specifically designed for the plumbing system.
Step 4: Run all water outlets
Make sure the outside drain plug and all water taps are closed, and then turn on the water pump. Run everything individually. Start with the hot tap in the kitchen and let it run until you see antifreeze. Do the same with the cold tap. Run the hot and cold taps in the bathroom sink, then run the hot and cold lines in the tub; make sure you run the shower head until you see antifreeze. Similarly, flush the toilet until you see antifreeze. Pour a cup full of antifreeze down all of the drains. If you have an outside shower or taps, make sure you run them on the hot and cold side until you see antifreeze. Finally, turn off your water pump.
Step 5: Fill check-valve line
The check-valve line is where you hook up your RV to city water. Make sure your water pump is in the off position. Remove the screen attached to your city water hookup. Push in on the check valve inside and hold it down until you see some antifreeze trickle back down that line.
If your RV has a washing machine or an icemaker, you’ll have to winterize those items as well. Give us a call or come into your local Fraserway dealership for more help with this step.
Finally, go back to the water pump and reconnect it. A lot of people forget to connect it again, and when they hook up their water in the spring and flood their floor, they’re left with subsequent water damage.
With that, you’re fully winterized for freezing temperatures!
If those steps were easy and straight-forward, then great! If they sound complicated, remember that you can always bring your RV into your local Fraserway service department.
Extra Tip: Check Your RV Owner's Manual
If your RV is equipped with additional appliances, you will want to ensure they're winter ready as well. The owners' manual will go over specific instructions on how to winterize them.